Mindful Photography
Mindful Photography
Through mindful photography, I help midlife women
overcome burnout, tiredness and overthinking
Through mindful photography, I guide midlife women to slow down, see the beauty within, and find peace & confidence within themselves again
WEEKLY BLOG POSTS.
WEEKLY BLOG POSTS
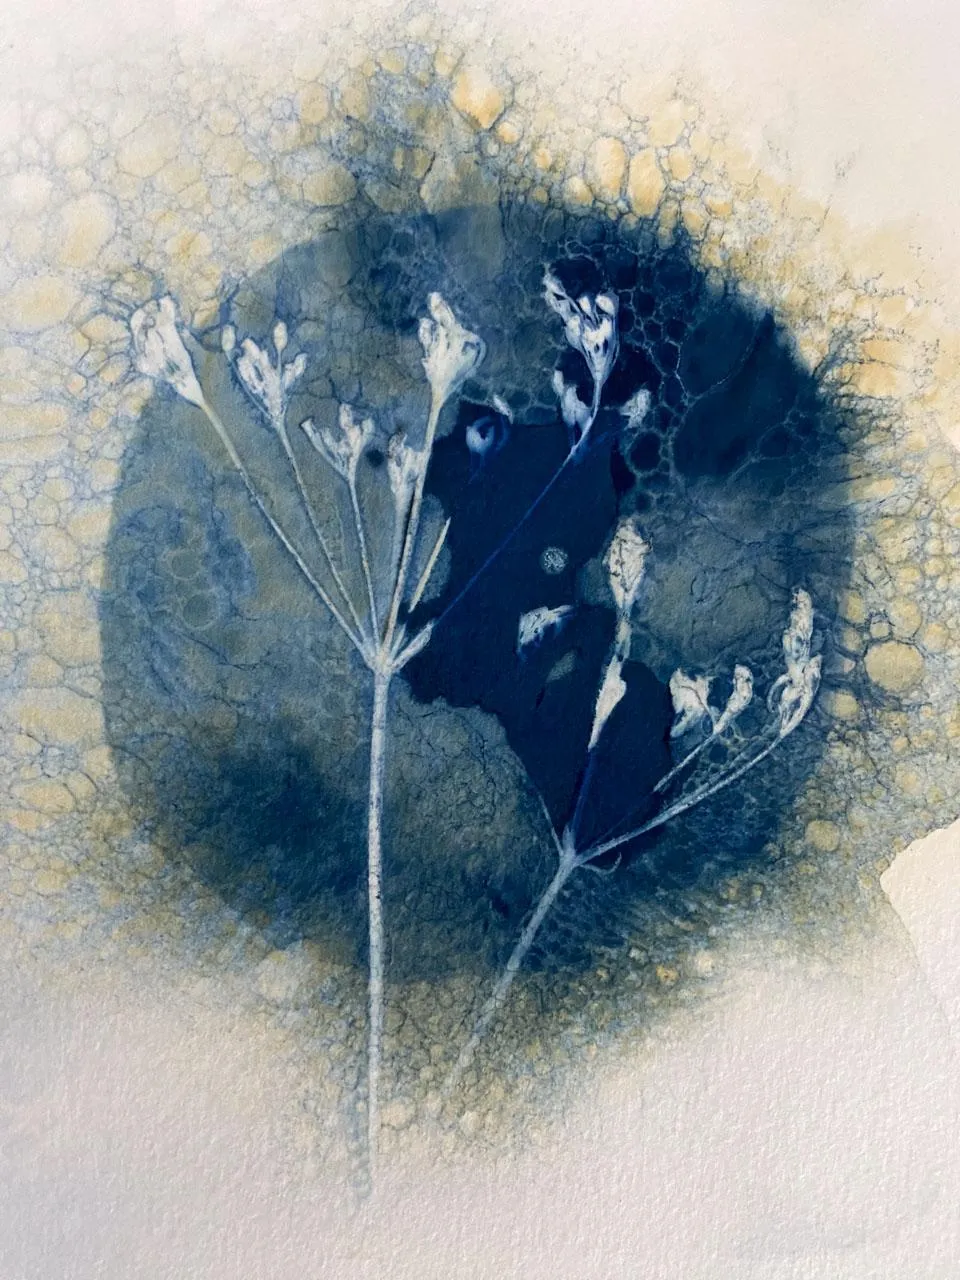
How to create a Cyanotype
“Failure is an Opportunity. If you blame someone else there is no end to the blame” - Lao Tzu.
Feeling overwhelmed?
Looking for a creative outlet to help you cope with stress and anxiety?
Look no further than practicing creating a little cyanotype.
This unique art form not only produces stunning images, but also offers a range of mental health benefits. In this blog, we'll explore the ways in which cyanotype can help improve your overall well-being and provide tips for incorporating this technique into your self-care routine.
Cyanotype is a photographic printing process that dates back to the mid-1800s. It's a unique and beautiful way to create art that's gaining popularity in the health and wellness community.
This process involves coating paper with a light-sensitive solution and placing objects or negatives on top of it.
After exposing it to light, the paper is washed with water, and the image appears.
Cyanotype art has been shown to have a calming effect on the mind and can be a great way to relax and unwind.
So, if you're looking for a new art form to try, this could be it!
Studies have shown that engaging in creative activities like cyanotype can reduce stress, improve mood, and boost overall mental wellbeing. Whether you're a seasoned artist or a beginner looking to try something new, incorporating cyanotype into your self-care routine can provide a therapeutic outlet for your emotions.
The process is easy to learn and can be a great way to express yourself creatively while also reducing stress and anxiety.
Whether you're a professional artist or simply looking for a new way to unwind, cyanotype is definitely worth exploring as a tool for creativity, reducing stress and calming the mind.
Furthermore, the final product of a cyanotype can be a source of pride and accomplishment, which can boost self-esteem and confidence.
Heres how to begin:
1. Paper. I use paper from a watercolour book from a stationary shop or from Amazon, if you dont have any then try it on a reasonably thick paper if you have some or you could really experiment and try it on fabric, wood, or save your egg shells, as you can coat the inside of them and use that thought this is tricky as its so delicate
2. Chemicals. I buy mine on Amazon from a company call Jacquard. There are 2 bottles. One is called Ferric Ammonium Citrate which is a food ingredient , it purifies water also. the other is Potassium Ferricyanide, which has low toxicity. When it is mixed with Ferric Ammonium Citrate then a deep Prussia blue is generated by the reaction. Hence thats why these 2 chemicals are perfect for Cyanotypes.
3.Reading the instructions on the bottles, mix equal parts of each one, I use a pipette and a small plastic tray to mix mine in, you don't need very much at all, a very small amount , 3/4 of a pipettte, covers 4 postcard sized pieces of watercolour paper. I only mix the solution when I need it as it only lasts 2 - 4 hours so not worth mixing up beforehand. Ensure you mix it in a dark room, I usually pull the blind down in the bathroom or in the shed with a blanket pinned over the window. You will also need your paper here as well ready to coast it, as it will dry in the dark.
4.Once the solution is mixed use a soft sponge or small/ medium paintbrush to coat the paper. Again as you practice, you can experiment with covering all the paper neatly or drawing a circle of solution or apply it in a haphazard way that doesn't meet the edges. I like all of these methods, and use which I feel matches what I am going to place on the paper.
5.Then wait for the paper to dry. Its in a dark room, so make sure no ones going to open the door in the next few minutes. I usually leave it for half an hour as the paper I use is quite thick, usually around 300 gsm - but experiment and see what happens.
6.When its dry, place your paper on a board, I use the base to a clipframe, then place your chosen object to the paper, a fern is a good place to begin, or feathers. I usually press my flowers and leaves in my home made flower press or under heavy books for a few days beforehand, to ensure they are really flat.
7. Then place a piece of glass over it that is bigger than the paper. I dont clip it down usually but you can use bulldog clips to keep the glass still. I use glass from a clip frame .
8.Place it outside on the board from the clipframe in the light. Once it goes a browny bronze colour, you know it is ready. Depending on the weather, could be 5 minutes might be 20...sometimes it can be a lot longer if its cloudy. Bring it back inside and go to the sink. Take off the glass and rinse it so you can use it again for the next one. Take off the chosen object, and place the paper in a shallow amount of cold water in the sink - or use a shallow tray. I tend to move the water around with my hands in the sink or if you use a tray, pick it up at the ends and gently move it from side to side to create movement in the water.
9.I usually rinse it for 5 - 8 minutes. Then leave it to dry flat , not near direct light. You will find that the colours change, becoming a bit deeper , overnight.
Then go ahead & practice another one because , like life, you wont always have a perfect image, you will make mistakes, you will dislike some of them, but don't throw them away, keep them, you never know when you could use it - a bookmark, a thank you card for example.
Heres a list of things you will need with some links to helpful suggestions:
Watercolour paper - https://tinyurl.com/57a37ean or use a smaller size, I love the postcard size - https://tinyurl.com/ypc37c57
Chemicals - https://tinyurl.com/8kur2hm3
Paintbrush - not the type you paint walls with but the type you would use if you were to paint a picture.
Pipette - https://tinyurl.com/37t3wvuz
Glass ( I bought an A3 clipframe and use the board to coat the paper on and then expose each cyanotype on the board. It will get blue markings on it, it will like your artists paint pallette !
But...if this all sounds like too many things, search on Amazon or Google for a ready made Cyanotype kit which has it all in a box for you.
All you have to do now is experiment, be curious, accept that some exposures wont work, and enjoy the ones that do, have fun and be childlike about it, its the curiosity and playfulness that we tend to NOT do as we age, that creates stress and worry, fear and a sense of not being good enough. Remember, theres no such thing as perfection.
Going on from this_ practice wet cyanotype. I will do another blog post on this for you, all the same things required but you will need added extras like white vinegar, red wine, coffee, turmeric - in fact anything in the larder...
If you want to share your creations, I would love to see them. Send me a message on Instagram ( @melaniecollie) or come and join my Facebook group : https://www.facebook.com/groups/healingcamera
Enjoy!
Mel